كيفية إعداد وتكوين ASP.NET Core Identity
-
إن ASP.NET Core Identity عبارة عن Toolkit and an APIيمكنك من خلالها إنشاء ميزات Authorization and Authentication في التطبيقات. يمكن للمستخدمين إنشاء حساب وتسجيل الدخول باستخدام اسم مستخدم وكلمة مرور. وهذا يشمل أيضًا Roles and Roles Management. يستخدم ASP.NET Core Identity قاعدة بيانات SQL Server لتخزين أسماء المستخدمين user names وكلمات المرور passwords والأدوار roles وبيانات ملف التعريف profile data.
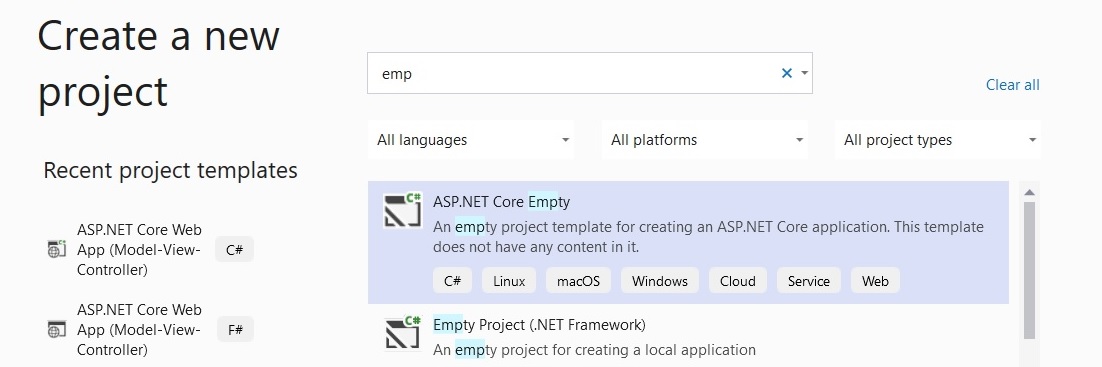
خلونا نبدا بعمل مشروع باسم ASP.NET.Core.Identity ويكون نوع المشروع ASP.NET Core Empty
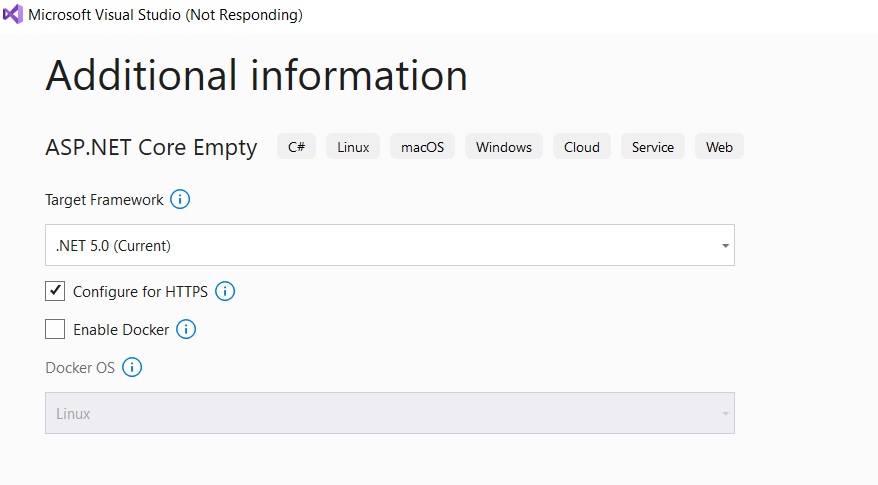
تأكد يكون framework رقم 5
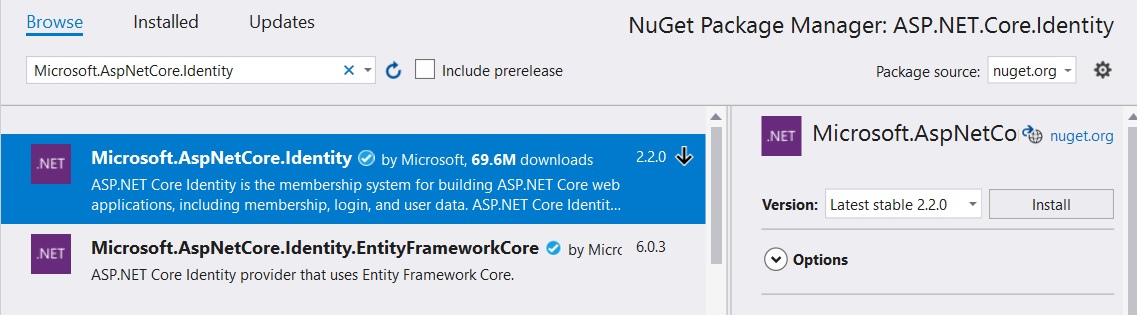
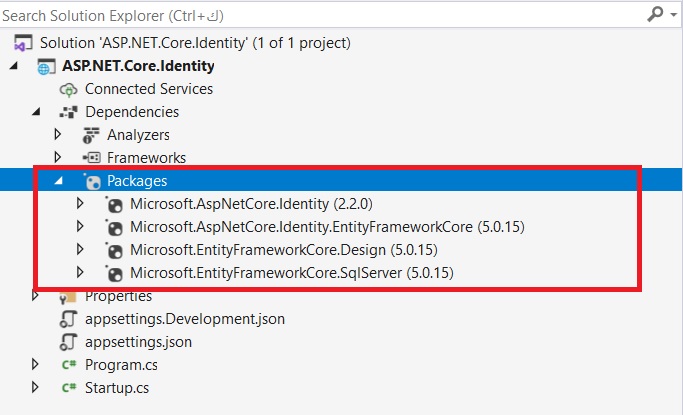
تمام وحتي نتعامل مع Identity بنحتاج الى تثبيت مجموعة من packages وهي :
- Microsoft.AspNetCore.Identity
- Microsoft.AspNetCore.Identity.EntityFrameworkCore
- Microsoft.EntityFrameworkCore.Design
- Microsoft.EntityFrameworkCore.SqlServer
بنفس الطريقة كمل الباقي.
بعد التثبيت بكون شكل المشروع :
اكيد لاحظت ان الاصدار الخاص بهذه Packages لازم يكون متوافق مع اصدار Frameworks الي بتشغل عليها. يعني اذا حاولت تثبت اي اصدار اكير من 5 بتكون النتيجة خطأ.
بخصوص Frameworks 6. اكيد في الها دروس مستقلة بتقدر نشوف اهم المميزيات فيها.
تمام الان بعد ما ثبتنا Packages صار وقت نجهز اعدادات التطبيق .
ننتقل الى Startup Class وقم بإعداد MVC framework وconfigure Middleware التي بتكون مطلوبة للمشروع. الكود المحث الخاص ب Startup.cs هو:
// This method gets called by the runtime. Use this method to add services to the container.
        // For more information on how to configure your application, visit https://go.microsoft.com/fwlink/?LinkID=398940
        public void ConfigureServices(IServiceCollection services)
        {
            services.AddControllersWithViews();
        }
        // This method gets called by the runtime. Use this method to configure the HTTP request pipeline.
        public void Configure(IApplicationBuilder app, IWebHostEnvironment env)
        {
            if (env.IsDevelopment())
            {
                app.UseDeveloperExceptionPage();
            }
            else
            {
                app.UseExceptionHandler("/Home/Error");
                // The default HSTS value is 30 days.
                app.UseHsts();
            }
            app.UseHttpsRedirection();
            app.UseStaticFiles();
            app.UseRouting();
           app.UseAuthorization();
            app.UseEndpoints(endpoints =>
            {
                endpoints.MapControllerRoute(
                name: "default",
                pattern: "{controller=Home}/{action=Index}/{id?}");
            });
        }
اكيد بنحتاج الى تثبيت Bootstrap بهدف التحكم بتصميم Views
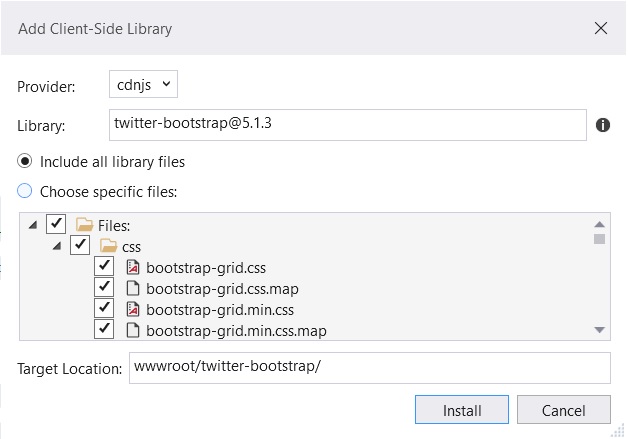
حتى نثبت Bootstrap بنحتاج أولاً إنشاء مجلد جديد باسم wwwroot في المشروع، وبعد الاضافة انقر بزر الماوس الأيمن فوقه wwwroot وحدد Add ➤ Client-Side Library .
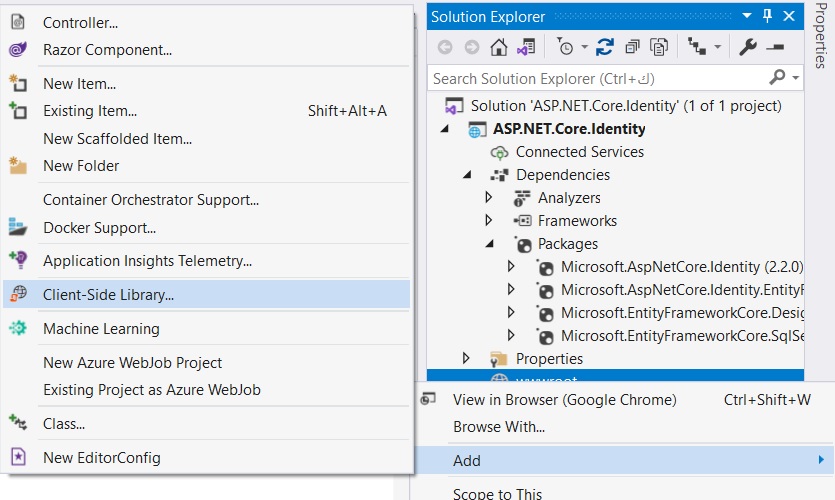
من النافذة التالية نبحث عن twitter-bootstrap في مربع نص وانقر على زر التثبيت.
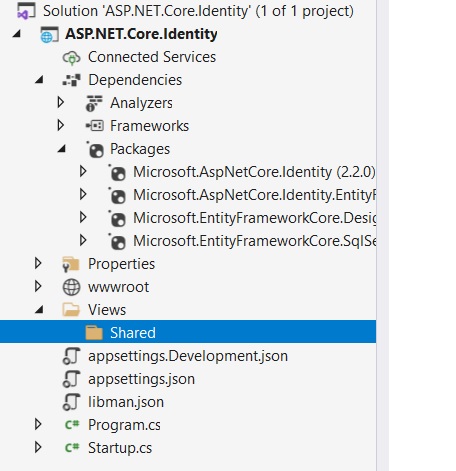
انشاء Views
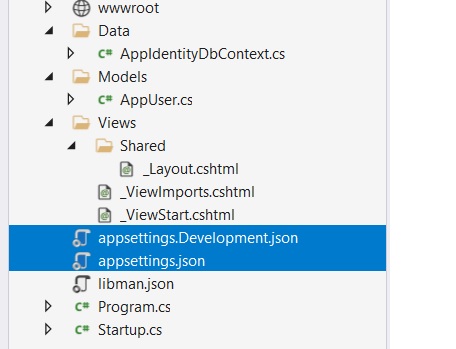
قم بإنشاء Views folder في المشروع ، وداخله قم بإنشاء مجلد آخر يسمى Shared folder.
انشاء ملف Layout
انقر بزر الماوس الأيمن فوق Shared folder ، وحدد Add ➤ New Item. من النافذة التالية حدد Razor Layout وانقر فوق الزر Add.
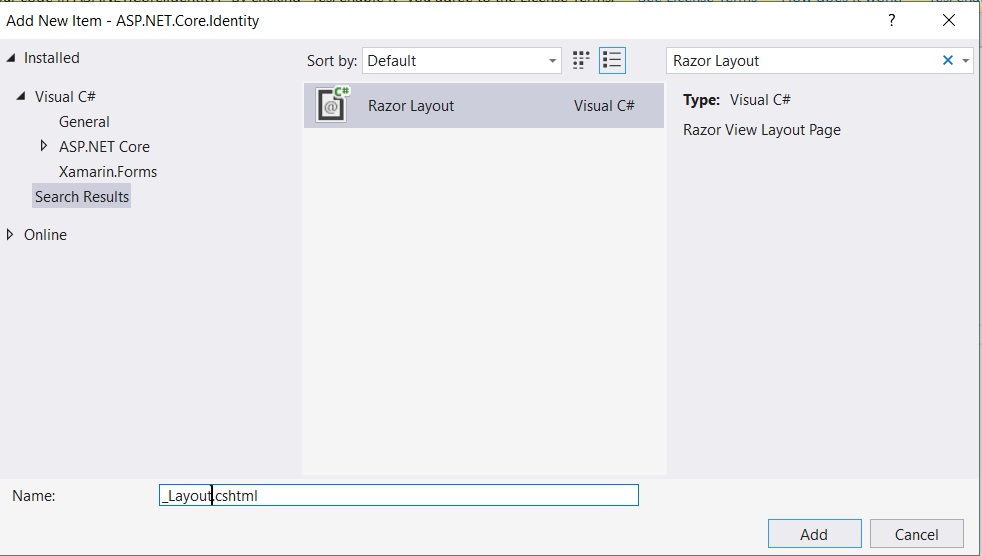
سيؤدي هذا إلى إضافة ملف Layout.cshtml_ في Shared folder وسيتم فتحه. بعد ذلك ، أضف الكود التالي إليه:
<!DOCTYPE html>
<html>
<head>
    <meta name="viewport" content="width=device-width" />
    <title>@ViewBag.Title</title>
    <link href="~/twitter-bootstrap/css/bootstrap.css" rel="stylesheet" />
</head>
<body class="m-1 p-1">
    @RenderBody()
</body>
</html>
@using Identity.Models
@addTagHelper *, Microsoft.AspNetCore.Mvc.TagHelpers
@{
    Layout = "_Layout";
}- model classes
- configuration changes
- controllers
- actions
using Microsoft.AspNetCore.Identity;
using System;
using System.Collections.Generic;
using System.Linq;
using System.Threading.Tasks;
namespace ASP.NET.Core.Identity.Models
{
    public class AppUser : IdentityUser
    {
    }
}
| اسم properties | الوصف |
| Id | يحتوي على Unique Id للمستخدم |
| UserName | يحتوي على اسم المستخدم الخاص بالمستخدم. |
| Claims | تقوم هذه الخاصية بإرجاع clams للمستخدم |
| Email | يحتوي على البريد الإلكتروني للمستخدم. |
| PasswordHash | يحتوي على hash لكلمة مرور المستخدم. |
| PhoneNumber | تقوم بإرجاع رقم الهاتف للمستخدم. |
| Roles | تقوم بإرجاع جميع الأدوار للمستخدم. |
| SecurityStamp | يحتوي على قيمة يتم تغييرها كلما تم تغيير هوية المستخدم. على سبيل المثال تغيير كلمة المرور أو رقم الهاتف ، إلخ. |
using ASP.NET.Core.Identity.Models;
using Microsoft.AspNetCore.Identity.EntityFrameworkCore;
using Microsoft.EntityFrameworkCore;
using System;
using System.Collections.Generic;
using System.Linq;
using System.Threading.Tasks;
namespace ASP.NET.Core.Identity.Data
{
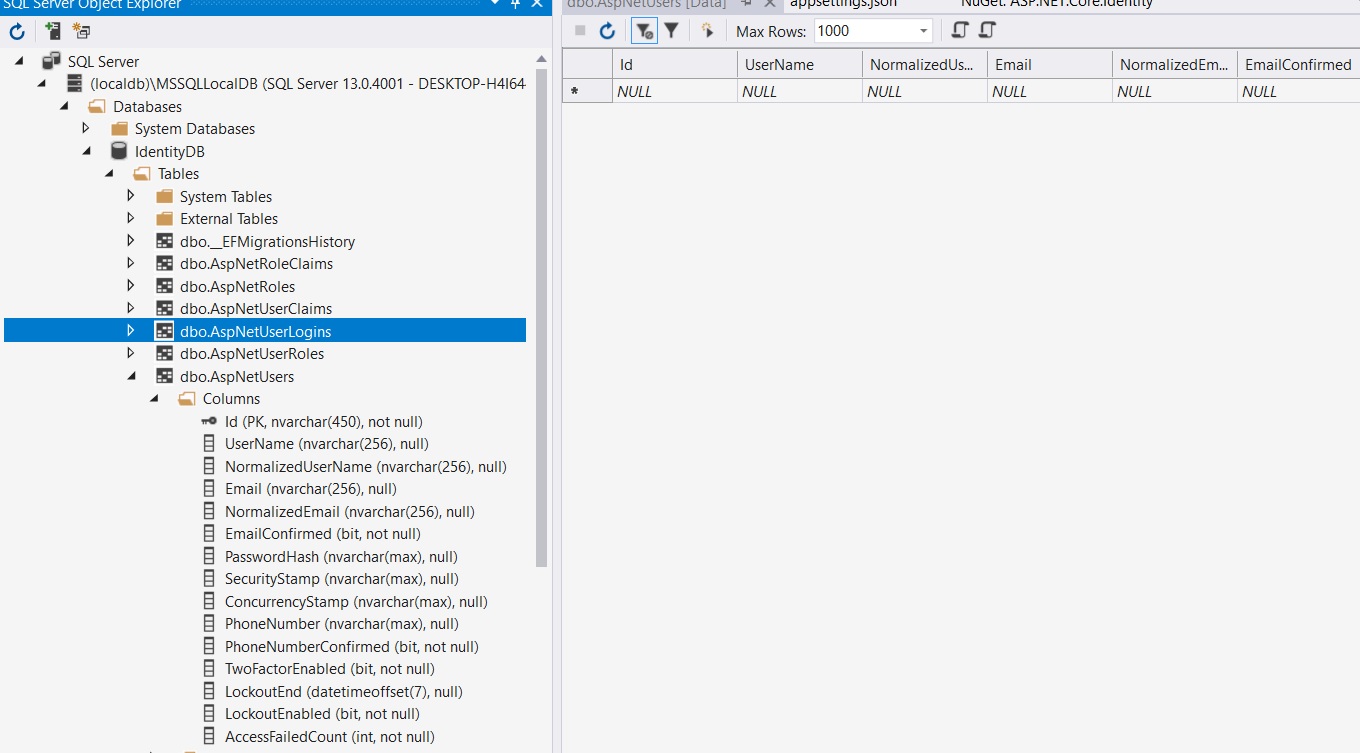
public class AppIdentityDbContext : IdentityDbContext<AppUser>
{
public AppIdentityDbContext(DbContextOptions<AppIdentityDbContext> options) : base(options) { }
}
}
{"Logging": {"LogLevel": {"Default": "Information","Microsoft": "Warning", "Microsoft.Hosting.Lifetime": "Information" }}, "ConnectionStrings": { "DefaultConnection": "Server=(localdb)MSSQLLocalDB;Database= IdentityDB;Trusted_Connection=True;MultipleActiveResultSets=true"}}
- appsettings.Development.json (يستخدم في مرحلة التطوير والاختبار)
- appsettings.json (يستخدم مع الاصدار النهائي للتطبيق عن النشر)
- مبدئا بتقدر تضيف نفس الكود في الملفين
- في Connection string حددنا اسم Server وهو (localdb)MSSQLLocalDB والاسم ممكن يكون مختلف حسب الاسم في جهازك، وبعدها حددنا اسم قاعدة البيانات وهي IdentityDB واكيد بتقدر تغير الاسم بأي شيء تريده.
تم اضافة الخاصية Trusted_Connection ووضعها على "True" الي بيعني ان المشروع سيتصل بقاعدة البيانات باستخدام windows authentication ولا توجد حاجة لتوفير اسم مستخدم وكلمة مرور قاعدة البيانات.
واضفنا كمان ;MultipleActiveResultSets=true وتختصر ب (MARS) ,هي ميزة تعمل مع SQL Server للسماح بتنفيذ مجموعات متعددة على اتصال واحد. هذا يعطي تنفيذ أسرع لعمليات.
اكيد حكينا عن هذا الموضوع سابقا في ADO.NET بتقدر ترجع للدروس للمزيد اذا كنت ترغب بذلك.
 public IConfiguration Configuration { get; }
 public Startup(IConfiguration configuration)
   {
      Configuration = configuration;
}services.AddDbContext<AppIdentityDbContext>(options => options.UseSqlServer(Configuration["ConnectionStrings:DefaultConnection"]));
services.AddIdentity<AppUser, IdentityRole>().AddEntityFrameworkStores<AppIdentityDbContext>().AddDefaultTokenProviders();في هذا الكود قمنا بالتالي:
- تحديد parameter في AddIdentity method’s مع class المستخدم لتمثيل المستخدمين (AppUser) و class المستخدم لتمثيل الأدوار Identity Role
- في طريقة AddEntityFrameworkStores يتم تحديد أن Identity يجب أن تستخدم EF Core و DB Content class والتي هي في المشروع AppIdentityContext class
- تضيف طريقة AddDefaultTokenProviders موفري tokens المستخدمة لإعادة تعيين كلمات المرور وتغيير البريد الإلكتروني وتغيير عمليات أرقام الهاتف ولإنشاء two factor authentication و token generation.
واخر اضافة الى Startup class هي إضافة ()app.UseAuthentication إلى ()Configure.
وهذا يعني أنه في كل طلب HTTP ، ستتم إضافة credentials على Cookie أو عنوان URL سيؤدي هذا الى ربط المستخدمين الذين تقدمو بطلب HTTP إلى التطبيق.
using ASP.NET.Core.Identity.Data;
using Microsoft.AspNetCore.Builder;
using Microsoft.AspNetCore.Hosting;
using Microsoft.AspNetCore.Http;
using Microsoft.EntityFrameworkCore;
using Microsoft.Extensions.DependencyInjection;
using Microsoft.Extensions.Hosting;
using System;
using System.Collections.Generic;
using System.Linq;
using System.Threading.Tasks;
using Microsoft.Extensions.Configuration;
using ASP.NET.Core.Identity.Models;
using Microsoft.AspNetCore.Identity;
namespace ASP.NET.Core.Identity
{
    public class Startup
    {
        public IConfiguration Configuration { get; }
        public Startup(IConfiguration configuration)
        {
            Configuration = configuration;
        }

        // This method gets called by the runtime. Use this method to add services to the container.
        // For more information on how to configure your application, visit https://go.microsoft.com/fwlink/?LinkID=398940
        public void ConfigureServices(IServiceCollection services)
        {
            services.AddDbContext<AppIdentityDbContext>(options => options.UseSqlServer(Configuration["ConnectionStrings:DefaultConnection"]));
            services.AddIdentity<AppUser, IdentityRole>().AddEntityFrameworkStores<AppIdentityDbContext>().AddDefaultTokenProviders();
            services.AddControllersWithViews();
        }
        // This method gets called by the runtime. Use this method to configure the HTTP request pipeline.
        public void Configure(IApplicationBuilder app, IWebHostEnvironment env)
        {
            if (env.IsDevelopment())
            {
                app.UseDeveloperExceptionPage();
            }
            else
            {
                app.UseExceptionHandler("/Home/Error");
                // The default HSTS value is 30 days.
                app.UseHsts();
            }
            app.UseHttpsRedirection();
            app.UseStaticFiles();
            app.UseRouting();
            app.UseAuthentication();
            app.UseAuthorization();
            app.UseEndpoints(endpoints =>
            {
                endpoints.MapControllerRoute(
                name: "default",
                pattern: "{controller=Home}/{action=Index}/{id?}");
            });
        }
    }
}
dotnet tool install --global dotnet-ef
PM> cd ASP.NET.Core.Identity
dotnet ef migrations add MyCommand1

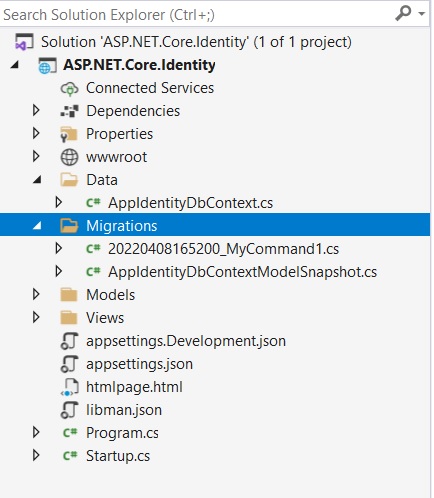
dotnet ef database update


اترك تعليقك