إنشاء عناوين URL Outgoing في Views
-
بنتعلم في هذا الدرس كيفية استخدام URL Routing أيضًا لإنشاء Outgoing URL(links) في Views. بحيث تعمل على معالجة قضايا مهمة لأن الروابط يتم إنشاؤها تلقائيًا بناءً على المسارات routes في التطبيق. لذلك إذا قمت بتغيير routes ، فسيتم تغيير links التي تم إنشاؤها في Views تلقائيًا بناءً على new route ولن تضطر إلى تغيير الروابط يدويًا واحدة تلو الأخرى.
لفهم كيفية إنشاء outgoing links.
خلونا نتأكد أولاً من وجود المسار route التالي فقط في التطبيق الخاص بنا:
app.UseEndpoints(endpoints =>
            {
                endpoints.MapControllerRoute(
                name: "default",
                pattern: "{controller=Home}/{action=Index}/{id?}");
            });
@using StudentsAcademy
@using StudentsAcademy.Models
@using Microsoft.AspNetCore.Http
@inject Microsoft.AspNetCore.Http.IHttpContextAccessor HttpContextAccessor
@addTagHelper *, Microsoft.AspNetCore.Mvc.TagHelpers
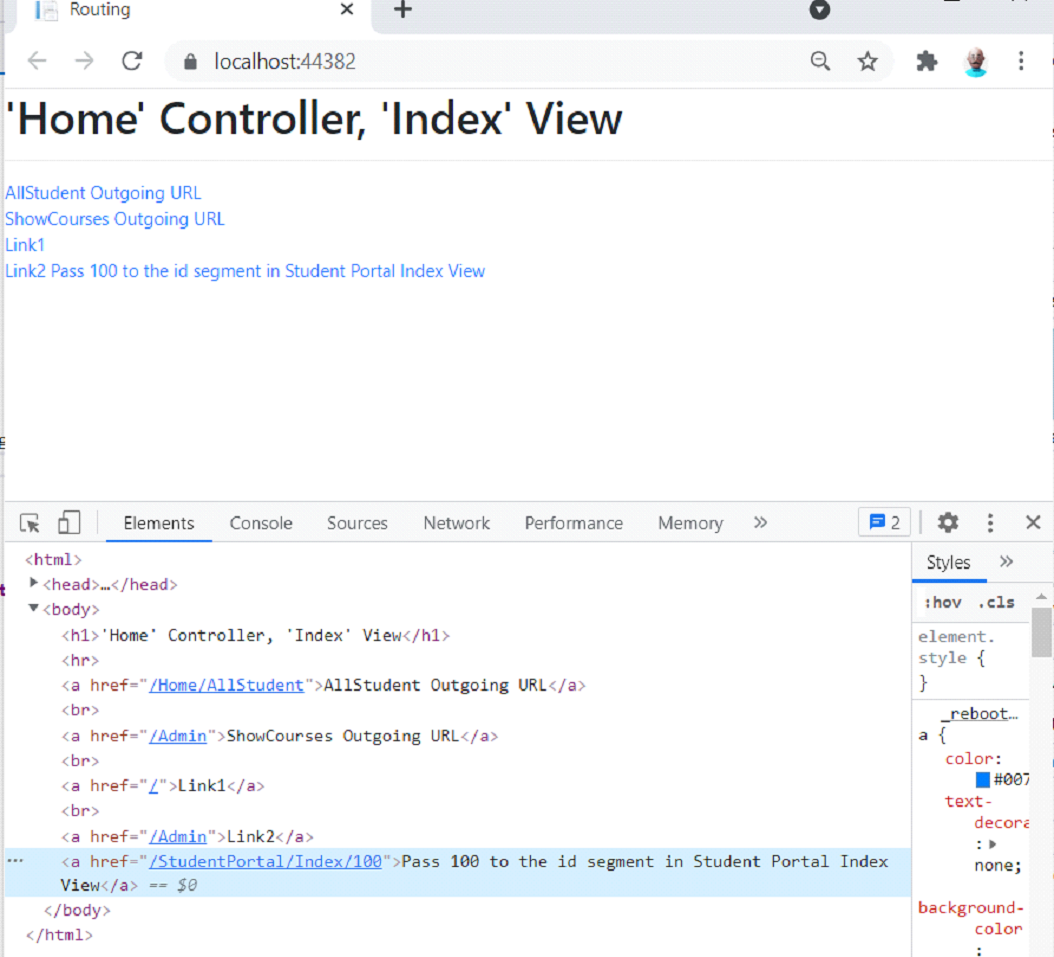
<a asp-action="AllStudent">AllStudent Outgoing URL</a>
https://localhost:44382/home/index
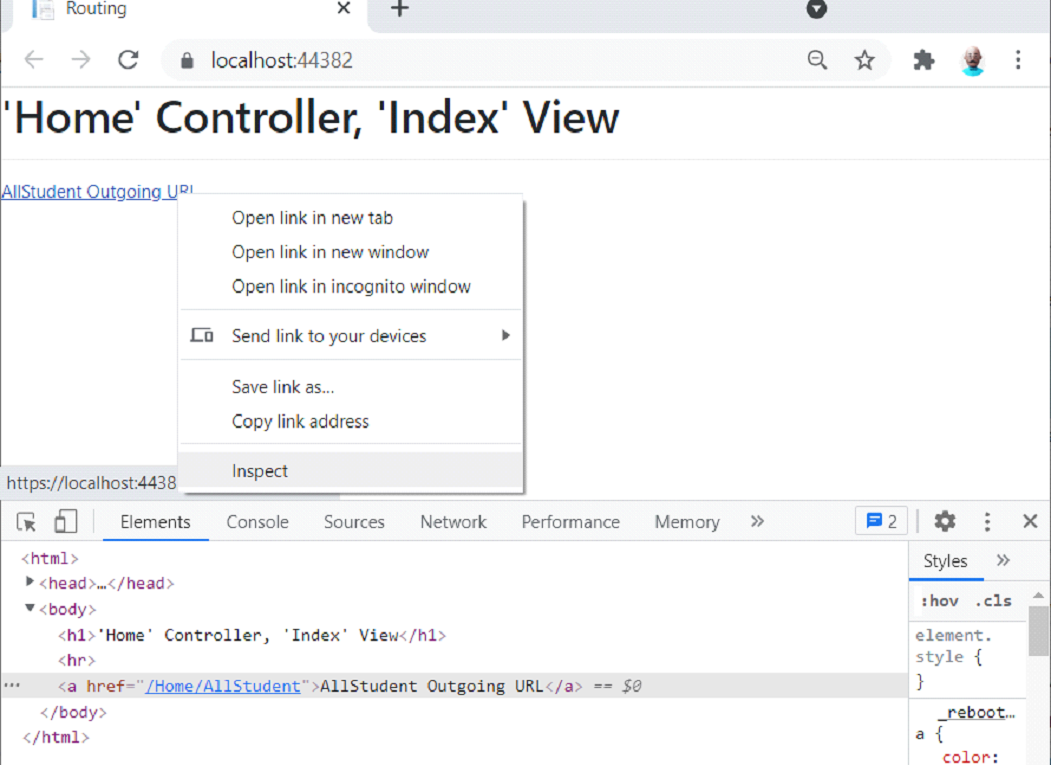
<a href="/Home/AllStudent"> AllStudent Outgoing URL</a>
   <a asp-action="AllStudent">AllStudent Outgoing URL</a>
    <br />
    <a asp-controller="Admin" asp-action="Index">ShowCourses Outgoing URL</a>
<a href="/Admin"> ShowCourses Outgoing URL </a>
<a asp-action="Index">Go to Index</a>
<a href="/">Go to Index</a>
using Microsoft.AspNetCore.Mvc;
using System;
using System.Collections.Generic;
using System.Linq;
using System.Threading.Tasks;
namespace StudentsAcademy.Controllers
{
    [Route("Student/[controller]/DashBoard/[action]/{id:allowCity?}")]
    public class AdminController : Controller
    {
      // [Route("[controller]/DashBoard")]

        public string Index()
        {
            return "@@#Admin@@# Controller, @@#Index@@# View";
        }
        public string List()
        {
            return "@@#Admin@@# Controller, @@#List@@# View";
        }
        [Route("[controller]/DashBoard/[action]")]
        public string Show()
        {
            return "@@#Admin@@# Controller, @@#Show@@# View";
        }
    }
}
<a asp-controller="Admin" asp-action="Index">ShowCourses Outgoing URL</a>
<a href="/Student/Admin/DashBoard/Index">ShowCourses Outgoing URL</a>
- تزويد كل URL segment بقيمة.
- بالنسبة ل default-only variables ، يجب إما عدم توفير القيمة أو توفير القيمة التي تطابق قيمتها الافتراضية.
Default-only variables هي تلك الغير الموجودة في عنوان URL ولكن يتم توفير قيمة افتراضية لها عن طريق routes في ملف Startup.
app.UseEndpoints(endpoints =>
{
    // Outgoing linss generations
    endpoints.MapControllerRoute(
        name: "defaultonly",
        pattern: "{controller}/{action}",
        defaults: new { myCountry = "Jordan" });
});
- يجب أن تلبي قيم segment variables قيود المسار route constraint.
app.UseEndpoints(endpoints =>
{
    endpoints.MapControllerRoute(
        name: "Student",
        pattern: "Student/{action}",
        defaults: new { controller = "Home" });
    endpoints.MapControllerRoute(
        name: "default",
        pattern: "{controller=Home}/{action=Index}/{id?}");
});
@{ Layout = null; }
<!DOCTYPE html>
<html>
<head>
<title>Routing</title>
</head>
<body>
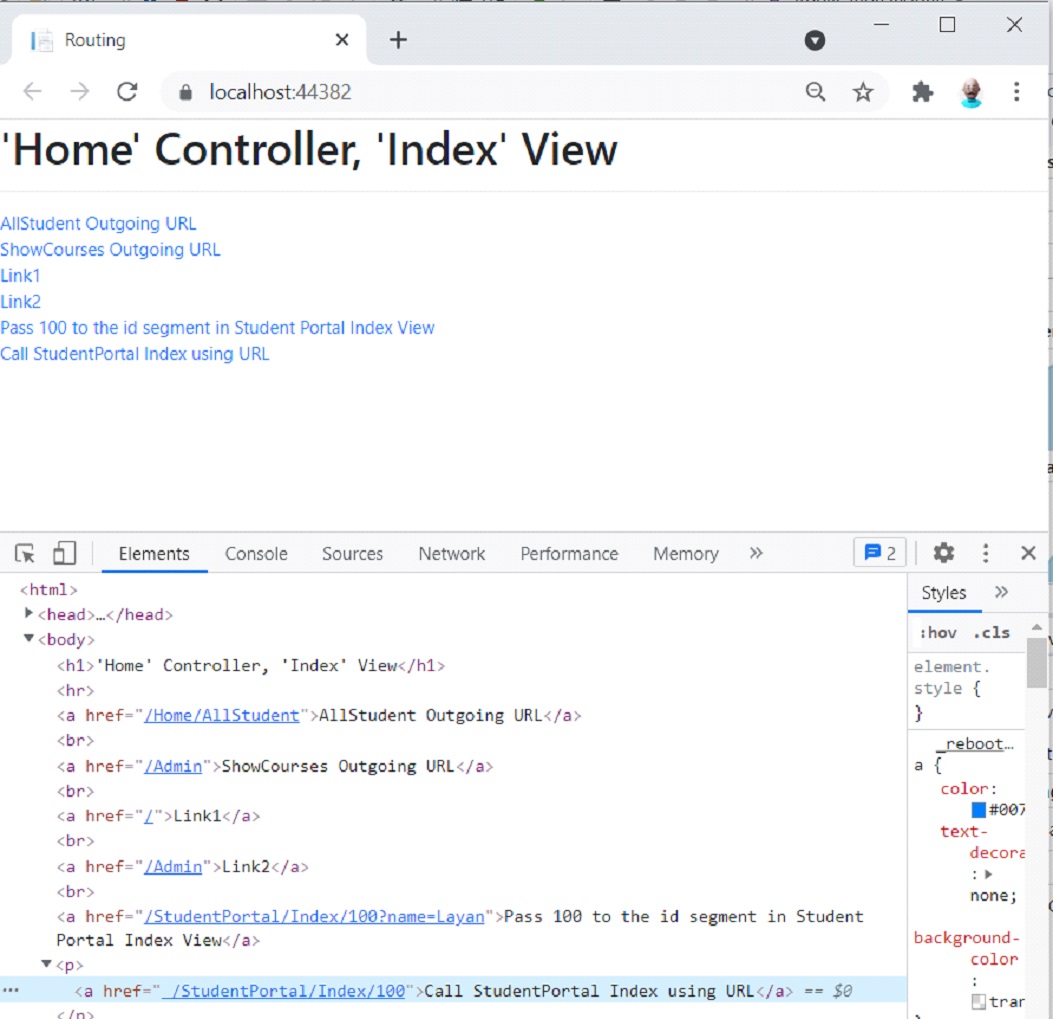
<h1>@@#Home@@# Controller, @@#Index@@# View</h1>
<hr />
@ViewBag.CitName
<a asp-action="AllStudent">AllStudent Outgoing URL</a>
<br />
<a asp-controller="Admin" asp-action="Index">ShowCourses Outgoing URL</a>
<br />
<a asp-action="Index">Link1</a>
<br />
<a asp-controller="Admin">Link2</a>
</body>
</html>
<a href="/Students/AllStudent">AllStudent Outgoing URL</a>
<a href="/Admin">ShowCourses Outgoing URL</a>
asp-route- *
using Microsoft.AspNetCore.Mvc;
using System;
using System.Collections.Generic;
using System.Linq;
using System.Threading.Tasks;
namespace StudentsAcademy.Controllers
{
public class StudentPortalController : Controller
{
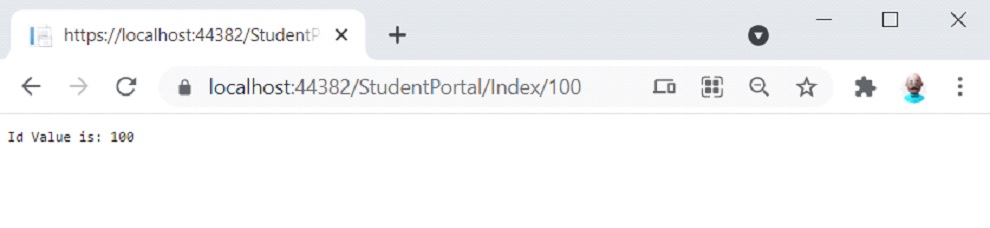
public string Index(int id)
{
return "Id Value is: " + id;
}
}
}
asp-route-*
<a asp-controller="StudentPortal" asp-action="Index" asp-route-id="100">Pass 100 to the id segment in Student Portal Index View</a>
https://localhost:44382/home/index
  app.UseEndpoints(endpoints =>
            {
                endpoints.MapControllerRoute(
                    name: "default",
                    pattern: "{controller=Home}/{action=Index}/{id?}");
            });
using Microsoft.AspNetCore.Mvc;
using System;
using System.Collections.Generic;
using System.Linq;
using System.Threading.Tasks;
namespace StudentsAcademy.Controllers
{
    public class StudentPortalController : Controller
    {
        public string Index(int id, string name)
        {
            return "Id Value is: " + id + " Name value is: " + name;
        }
    }
}
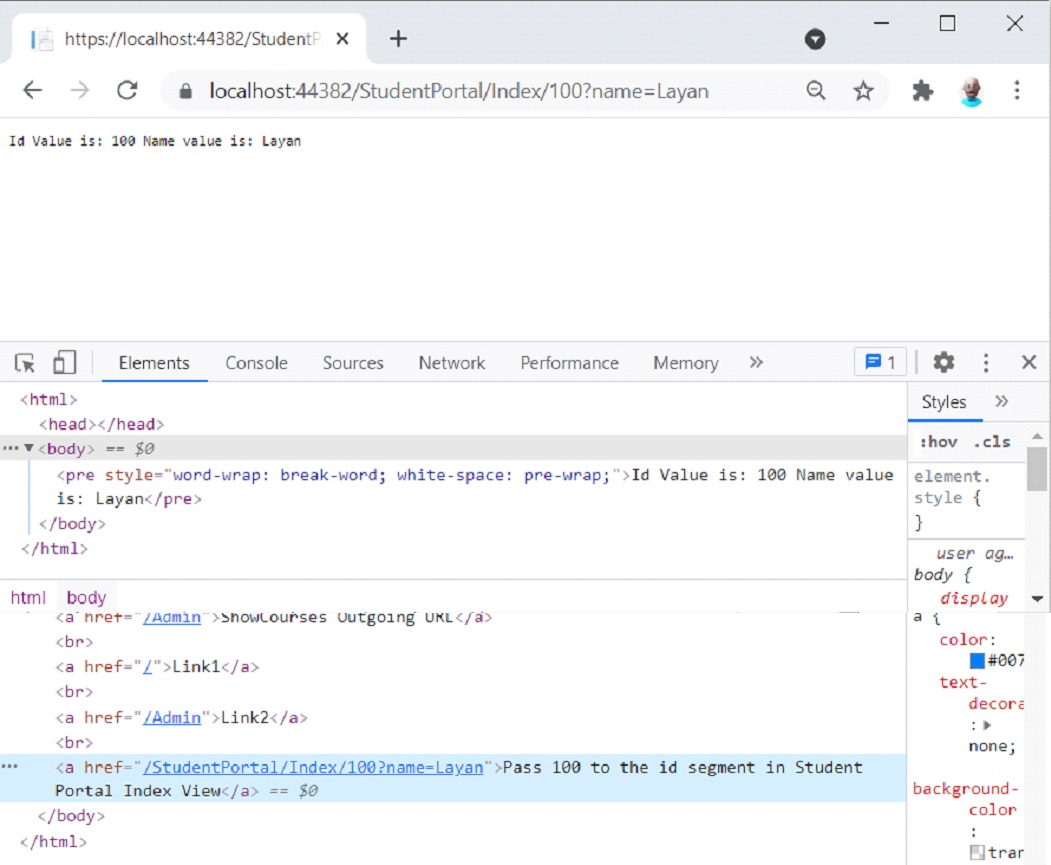
<a asp-controller="StudentPortal" asp-action="Index" asp-route-id="100" asp-route-name="Layan">Pass 100 to the id segment in Student Portal Index View</a>
https://localhost:44382/home/index
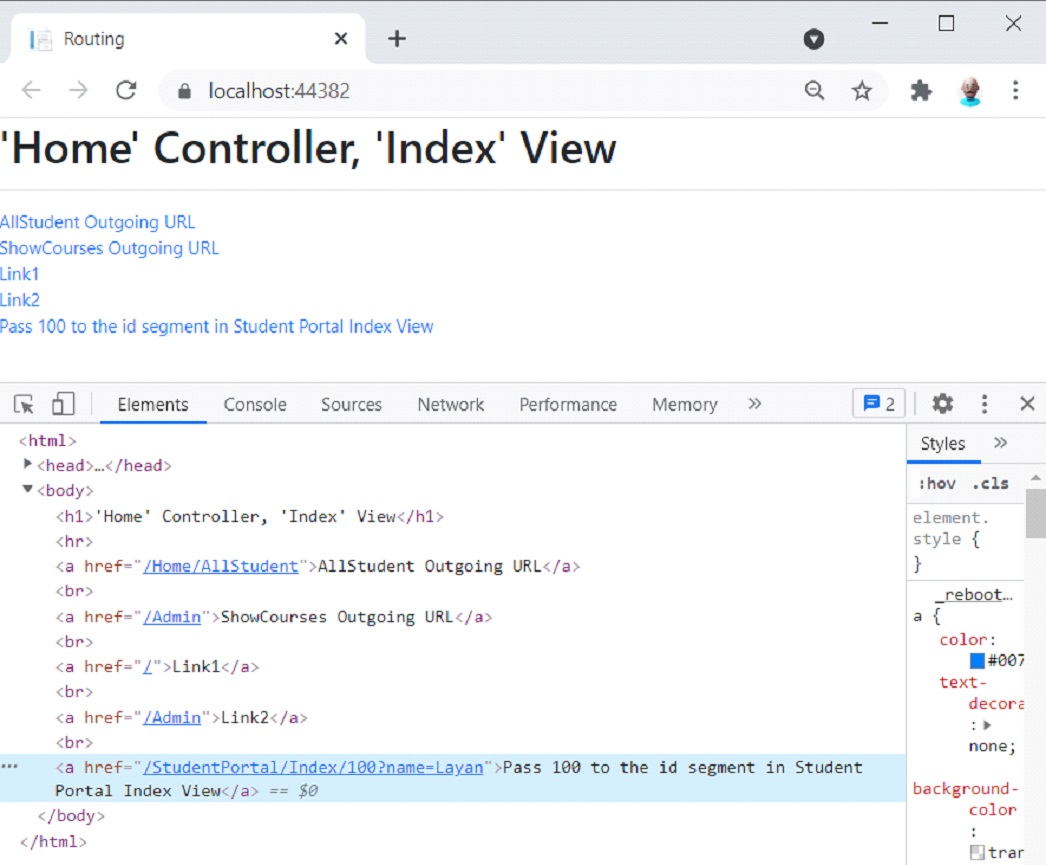
كما تلاحظ في الرابط ان Link يحتوي على name value بقيمة Layan تم تمريرها ك query string وذلك لعدم وجود segment variable باسم name في route.
انقر فوق link ستكون نتيجة التنفيذ كما في الصورة:
app.UseEndpoints(endpoints =>
{
    endpoints.MapControllerRoute(
        name: "StudentPortal",
        pattern: " StudentPortal/{controller=Home}/{action=Index}");
});
asp-route="name of the route".
<a asp-route="StudentPortal"> StudentPortal </a>
Url.Action()
<p><a href=" @Url.Action("Index", "StudentPortal", new { id = 100 })">Call StudentPortal Index using URL</a></p>https://localhost:44382/home/index
- Controller name.
- Action name.
string url = Url.Action("CustomVariable", "Home", new { id = 100 });<a href="/StudentPortal/Index#Printing">Printing</a>
asp-fragment="fragment-name" .
<a asp-controller=" StudentPortal" asp-action="Index" asp-fragment="Printing">
    URL Fragment
</a>
<a href="/StudentPortal/Index#Printing">URL Fragment</a>
options.AppendTrailingSlash = true
public void ConfigureServices(IServiceCollection services)
{
    services.Configure<RouteOptions>(options =>
            {
                options.AppendTrailingSlash = true;
            });
    services.AddControllersWithViews();
}
http://localhost:58470/Home/Check/
options.LowercaseUrls = true
public void ConfigureServices(IServiceCollection services)
{
    services.Configure<RouteOptions>(options =>
    {
        options.AppendTrailingSlash = true;
        options.LowercaseUrls = true;
    });
    services.AddControllersWithViews();
}


اترك تعليقك