HTML Table Styling
-
في هذه المقالة بنتعرف على تطبيق Style في الجدول في HTML، بنحكي عن الطرق المختلفة لتنفيذها وكيف تغيير النمط Style، واكيد يمكن تطبيق style على أي جزء من الجدول ممكن الجدول كامل او ممكن column او Row وممكن لعدد من column او Row
تمام نبدأ بتطبيق Padding & Spacing
إضافة Padding الى Table cells
Padding هو المسافة بين حواف cell edges ومكوناتها، والقيمة الافتراضية لها تساوي صفر
طبق المثال التالي :
<!DOCTYPE html>
<html>
<head>
<title>My favicon Icon</title>
<link rel="icon" type="image/x-icon" href="favicon.jpg">
<style>
table{
width: 100%;
}
table, th, td {
border:1px solid black;
border-collapse: collapse;
padding: 10px;
}
th {
background-color: gray;
border-color: brown;
width: 50%;
}
td {
background-color: gainsboro;
}
</style>
</head>
<body>
<table dir="rtl"><caption>التقرير الفصلي للطلاب</caption><tr><th >اسم الطالب</th><th>المعدل</th></tr>
<tr><td>حاتم</td><td>90</td>
</tr>
<tr><td>ليان</td><td>99</td>
</tr>
</table>
</body>
</html>
النتيجة:

حاول تغيير قيمة padding وشوف الفرق
يمكن تطبيق padding على top، bottom، left، right
طبق المثال التالي:
<!DOCTYPE html>
<html>
<head>
<title>My favicon Icon</title>
<link rel="icon" type="image/x-icon" href="favicon.jpg">
<style>
table{
width: 100%;
}
table, th, td {
border:1px solid black;
border-collapse: collapse;
padding-top: 10px;
padding-bottom: 20px;
padding-left: 30px;
padding-right: 40px;
}
th {
background-color: gray;
border-color: brown;
width: 50%;
}
td {
background-color: gainsboro;
}
</style>
</head>
<body>
<table dir="rtl"><caption>التقرير الفصلي للطلاب</caption><tr><th >اسم الطالب</th><th>المعدل</th></tr>
<tr><td>حاتم</td><td>90</td>
</tr>
<tr><td>ليان</td><td>99</td>
</tr>
</table>
</body>
</html>
إضافة Spacing الى Table cells
Spacing هو المسافة بين Cells، والقيمة الافتراضية لها تساوي 2 بكسل
لتغير Spacing يستخدم الامر :
border-spacing
طبق المثال التالي :
<!DOCTYPE html>
<html>
<head>
<title>My favicon Icon</title>
<link rel="icon" type="image/x-icon" href="favicon.jpg">
<style>
table {
width: 100%;
border-spacing: 50px;
}
table, th, td {
border:1px solid black;
}
th {
background-color: gray;
border-color: brown;
}
td {
background-color: gainsboro;
}
</style>
</head>
<body>
<table dir="rtl"><caption>التقرير الفصلي للطلاب</caption><tr><th >اسم الطالب</th><th>المعدل</th></tr>
<tr><td>حاتم</td><td>90</td>
</tr>
<tr><td>ليان</td><td>99</td>
</tr>
</table>
</body>
</html>
النتيجة:
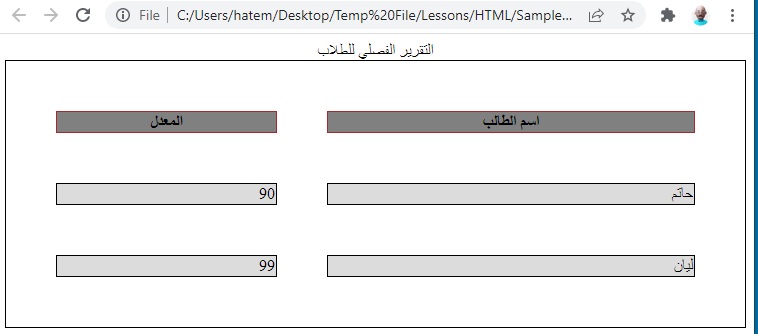
ملاحظة : Cell Spacing لا يعمل مع border-collapse: collapse
تمام التمام
الان نطبق Style يسمى Zebra Stripes
الفكرة من هذا style هو إعطاء الوان مختلفة ل Rows في الجدول وبتكون النتيجة على شكل Zebra( شكل الحمار الوحشي مخطط).
لتطبيق هذه الفكرة بنحتاج الى الكود:
tr:nth-child(even) {
  background-color: #D6EEEE;
}
الكود هذا بعمل على تلوين الصفوف واحد بعد الأخر حسب الاختيار (ممكن الاختيار بين even و Odd)
طبق الكود التالي في صفحة HTML
<!DOCTYPE html>
<html>
<head>
<title>My favicon Icon</title>
<link rel="icon" type="image/x-icon" href="favicon.jpg">
<style>
table {
width: 100%;
border-spacing: 50px;
}
table, th, td {
border:1px solid black;
border-collapse: collapse;
}
th {
background-color: gray;
border-color: brown;
}
tr:nth-child(odd) {
background-color: #cccece;
}
</style>
</head>
<body>
<table dir="rtl"><caption>التقرير الفصلي للطلاب</caption><tr><th >اسم الطالب</th><th>المعدل</th></tr>
<tr><td>حاتم</td><td>90</td>
</tr>
<tr><td>ليان</td><td>99</td>
</tr>
<tr><td>لارين</td><td>99</td>
</tr>
<tr><td>ملك</td><td>99</td>
</tr>
</table>
</body>
</html>
النتيجة:
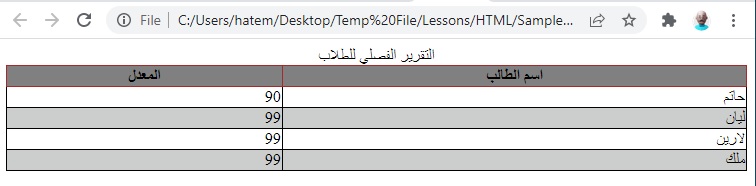
في الكود السابق طبقنا اللون #cccece على الصفوف الفردية odd
تطبيق النمط Zebra Stripes بشكل Vertical
يمكن تطبيق هذا النمط بشكل عمودي باستخدام الكود:
td:nth-child(odd), th:nth-child(odd) {
  background-color: #cccece;
}
النتيجة:
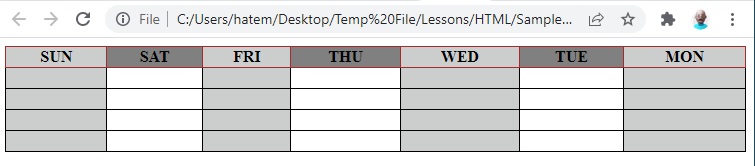
للدمج بين النوعين السابقين Vertical and Horizontal Zebra Stripes
بنستخدم الكود :
tr:nth-child(odd) {
  background-color: rgba(150, 212, 212, 0.4);
}
th:nth-child(odd),td:nth-child(odd) {
  background-color: rgba(150, 212, 212, 0.4);
}
طبق الكود التالي في صفحة HTML
<!DOCTYPE html>
<html>
<head>
    <title>My favicon Icon</title>
    <link rel="icon" type="image/x-icon" href="favicon.jpg">
    <style>
       table {
       width: 100%;
        border-spacing: 50px;
       }
 table, th, td {
  border:1px solid black;
  border-collapse: collapse;
}
th {
  background-color: gray;
  border-color: brown;

}
tr:nth-child(odd) {
  background-color: rgba(150, 212, 212, 0.4);
}
tr:nth-child(odd), th:nth-child(odd) {
  background-color: #cccece;
}
    </style>
</head>
<body>
    <table dir="rtl">
        <tr>
            <th>MON</th>
            <th>TUE</th>
            <th>WED</th>
            <th>THU</th>
            <th>FRI</th>
            <th>SAT</th>
            <th>SUN</th>
          </tr>
          <tr>
            <td> </td>
            <td> </td>
            <td> </td>
            <td> </td>
            <td> </td>
            <td> </td>
            <td> </td>
          </tr>
          <tr>
            <td> </td>
            <td> </td>
            <td> </td>
            <td> </td>
            <td> </td>
            <td> </td>
            <td> </td>
          </tr>
          <tr>
            <td> </td>
            <td> </td>
            <td> </td>
            <td> </td>
            <td> </td>
            <td> </td>
            <td> </td>
          </tr>
          <tr>
            <td> </td>
            <td> </td>
            <td> </td>
            <td> </td>
            <td> </td>
            <td> </td>
            <td> </td>
          </tr>
      </table>
</body>
</html>
إضافة فواصل افقيه Horizontal Dividers
لإضافة فواصل افقيه بنستخدم الكود:
tr {
  border-bottom: 1px solid #ddd;
}
طبق الكود التالي في صفحة HTML
<!DOCTYPE html>
<html>
<head>
<title>My favicon Icon</title>
<link rel="icon" type="image/x-icon" href="favicon.jpg">
<style>
table {
width: 100%;
border-spacing: 50px;
}
table, th, td {
border-collapse: collapse;
}
th {
background-color: gray;
border-color: brown;
}
tr {
border-bottom: 1px solid rgb(138, 136, 136);
}
</style>
</head>
<body>
<table dir="rtl"><caption>التقرير الفصلي للطلاب</caption><tr><th >اسم الطالب</th><th>المعدل</th></tr>
<tr><td>حاتم</td><td>90</td>
</tr>
<tr><td>ليان</td><td>99</td>
</tr>
<tr><td>لارين</td><td>99</td>
</tr>
<tr><td>ملك</td><td>99</td>
</tr>
</table>
</body>
</html>
النتيجة :

ملاحظة : انتبه لعدم الخلط في حال تطبيق border على كامل الجدول مع تطبيق الخطوط الافقية لان الأولوية ستكون ل border لكامل الجدول
الجزء الأخير تطبيق Hoverable Table
Hoverable هو تغيير لون Row للجدول في حال تحريك مؤشر Mouse فوقه
الموضوع بسيط جدا فقط بنطبق الكود التالي :
tr:hover {background-color: #D6EEEE;}طبق الكود التالي في صفحة HTML وشوف النتيجة:
<!DOCTYPE html>
<html>
<head>
<title>My favicon Icon</title>
<link rel="icon" type="image/x-icon" href="favicon.jpg">
<style>
table {
width: 100%;
border-spacing: 50px;
}
table, th, td {
border: 1px solid red;
border-collapse: collapse;
}
th {
background-color: gray;
border-color: brown;
}
tr {
border-bottom: 1px solid rgb(138, 136, 136);
}
tr:hover {background-color: #b9bbbb;}
</style>
</head>
<body>
<table dir="rtl"><caption>التقرير الفصلي للطلاب</caption><tr><th >اسم الطالب</th><th>المعدل</th></tr>
<tr><td>حاتم</td><td>90</td>
</tr>
<tr><td>ليان</td><td>99</td>
</tr>
<tr><td>لارين</td><td>99</td>
</tr>
<tr><td>ملك</td><td>99</td>
</tr>
</table>
</body>
</html>


اترك تعليقك