استخدام Areas في Routing
-
الفائدة من Areas هو تقسيم التطبيق الى اجزاء، بحيث يكون التطبيق اكثر سهولة ومرونة، مثال ذلك يمكن اضافة مجموعة من Areas مثل administration, billing, sales ... الخ،واكيد في حال تقسيم التطبيق لمجموعة من Areas بنقدر نعمل العديد من controllers, Models & Views تابعة لكل Areas. بحيث يمكن وبسهولة توزيع ومعرفة الملفات المرتبطة بكل جزء.
تحتوي Areas على MVC folder structure ، بحيث يمكن اضافة Controllers, Model and Views لكل area
تمام وحتي نفهم الموضوع نبدأ وكالعاده بمثال.
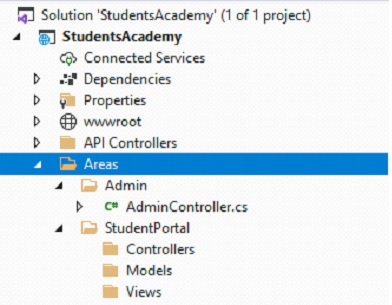
خلونا نعمل Area باسم StudentPortal،والهدف منها هو portal خاص بالطلاب ويمكن من خلاله استعراض الدروس التي تم التسجيل بها، استعراض المعلومات الشخصية، عمليات الدفع... الخ.
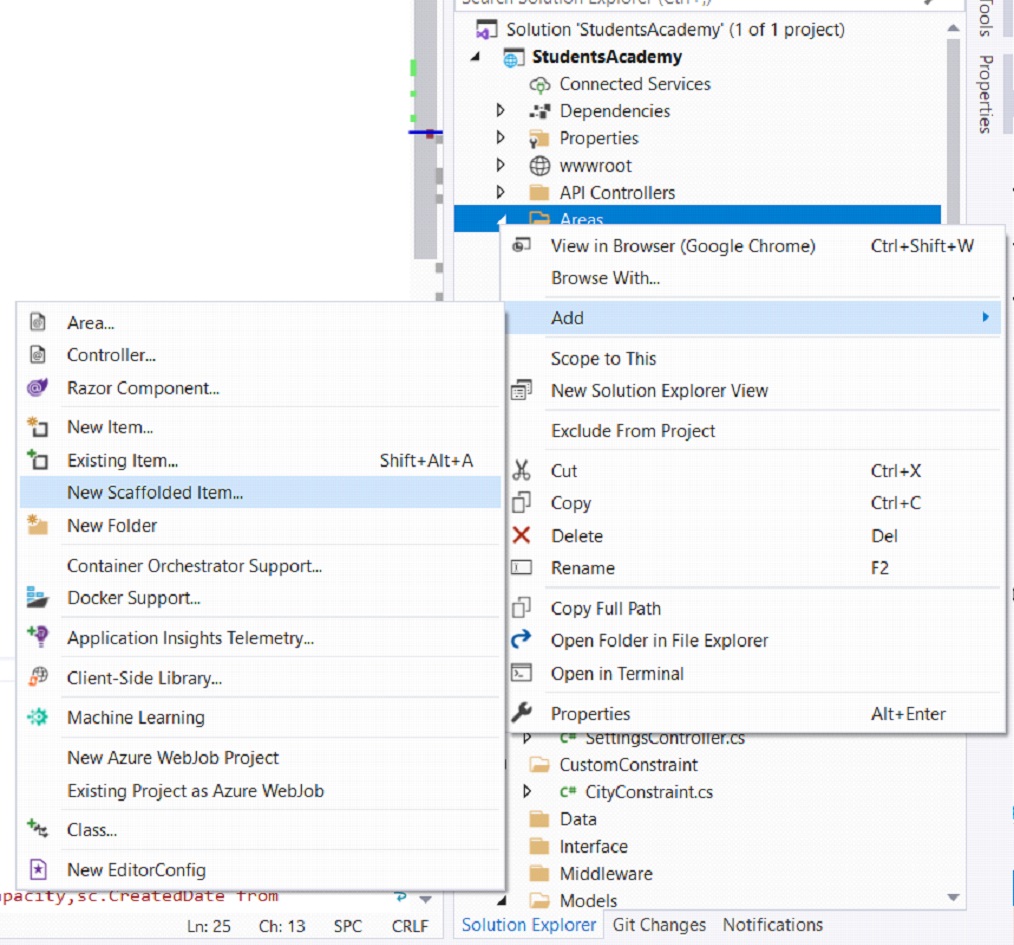
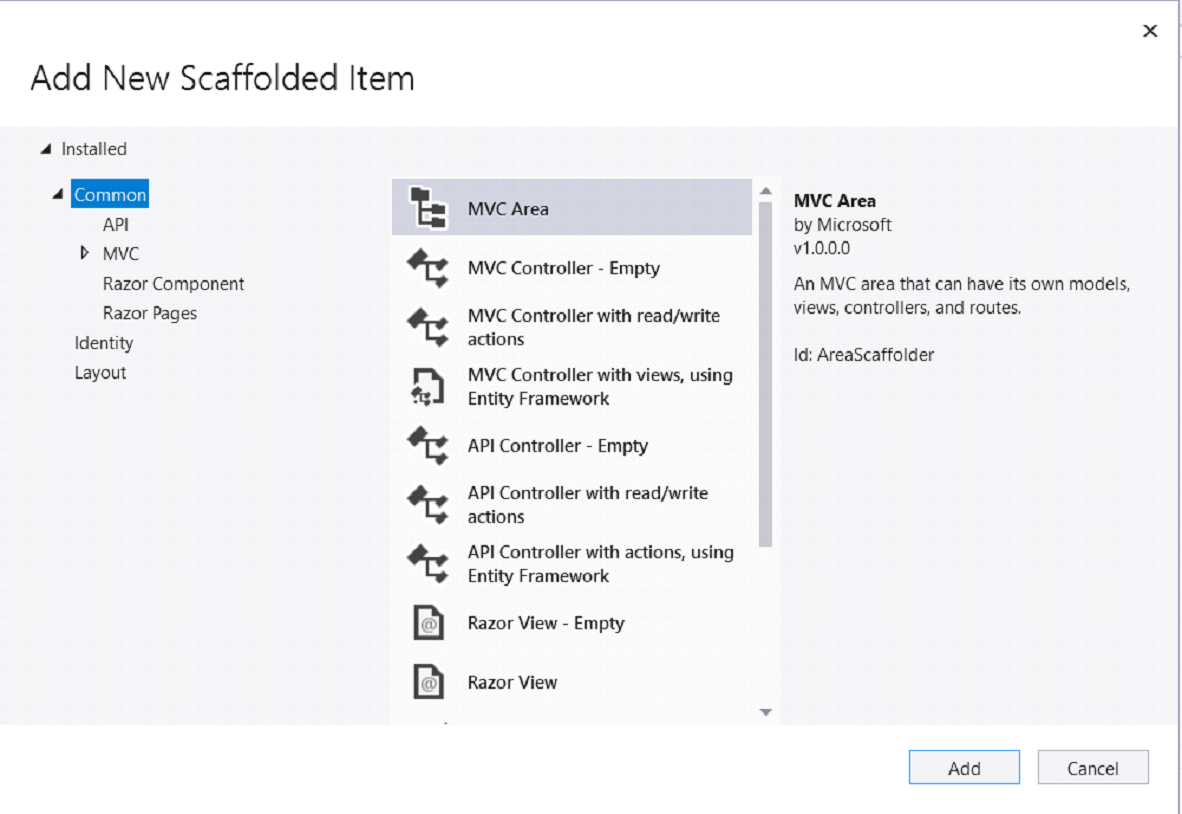
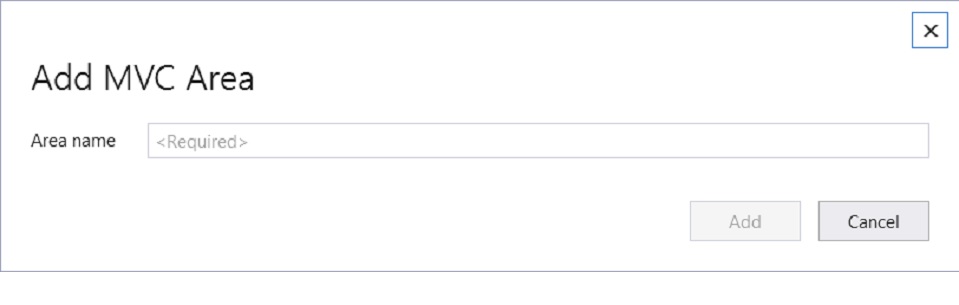
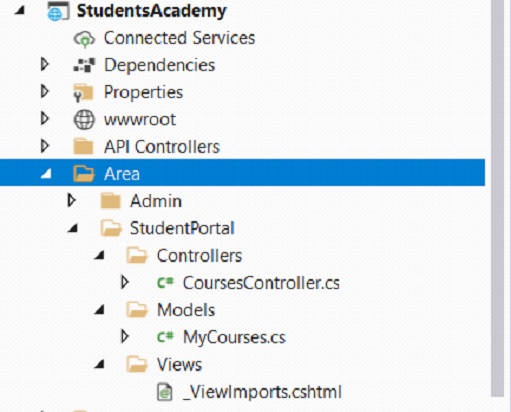
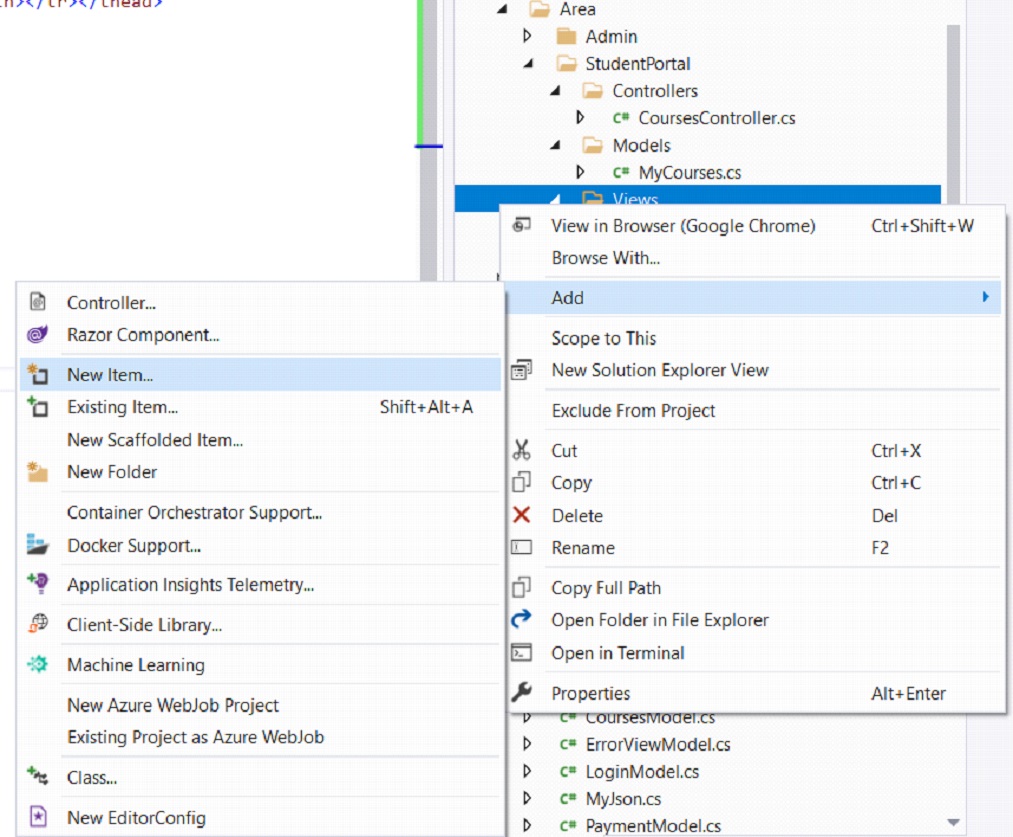
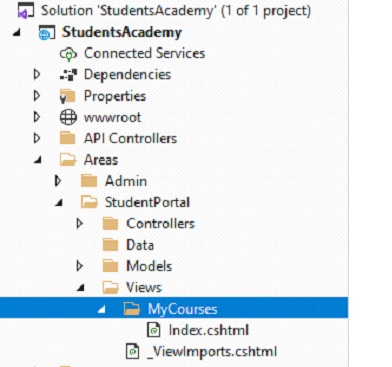
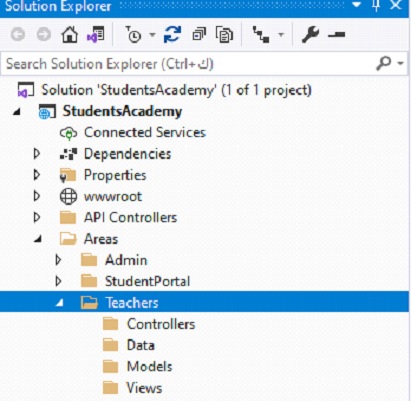
لإنشاء new Area في المشروع، انقر بزر الماوس الأيمن على اسم التطبيق وحدد Add ➤ New Folder وقم بتسمية هذا المجلد Areas. أنشئ folder آخر داخل مجلد Areas الذي تم إنشاؤه حديثًا وقم بتسميته باسم StudentPortal . الآن قم بإنشاء مجلدات Controllers, Models & Views بداخلها، كما هو واضح بالأسفل:
  app.UseEndpoints(endpoints =>
            {
                endpoints.MapControllerRoute(
                name: "Areas",
                pattern: "{area:exists}/{controller=Home}/{action=Index}/{id?}");
                endpoints.MapControllerRoute(
                    name: "default",
                    pattern: "{controller=Home}/{action=Index}/{id?}");
            });
 endpoints.MapAreaControllerRoute(
        "Admin",
        "Admin",
        "Admin/{controller=Home}/{action=Index}/{id?}");
using System;
using System.Collections.Generic;
using System.Linq;
using System.Threading.Tasks;
namespace StudentsAcademy.Area.StudentPortal.Models
{
    public class MyCourses
    {
        public int ID { get; set; }
        public string CourseNumber { get; set; }
        public string CourseName { get; set; }
        public string CourseDescription { get; set; }
        public decimal Price { get; set; }
        public int Capacity { get; set; }
        public DateTime CreatedDate { get; set; }
    }
}
using Microsoft.AspNetCore.Mvc;
using Microsoft.Data.SqlClient;
using Microsoft.Extensions.Configuration;
using StudentsAcademy.Area.StudentPortal.Models;
using System;
using System.Collections.Generic;
using System.Data;
using System.Linq;
using System.Threading.Tasks;
namespace StudentsAcademy.Area.StudentPortal.Controllers
{
    [Area("StudentPortal")]
    public class MyCoursesController : Controller
    {
        public IConfiguration Configuration { get; }
        public MyCoursesController(IConfiguration configuration)
        {
            Configuration = configuration;
        }
        public IActionResult Index(int StudentID)
        {
            List<MyCourses> MyCoursesList = new List<MyCourses>();
            try
            {
                string connectionString = Configuration["ConnectionStrings:DefaultConnection"];
                using (SqlConnection connection = new SqlConnection(connectionString))
                {
                    DataTable dataTable = new DataTable();
  string sql = @"declare @StudentID int="+ StudentID + " select sc.StudentCourseId, c.CourseNumber, c.CourseName, c.CourseDescription, c.Price, c.Capacity, sc.CreatedDate from StudentCourses sc inner join Courses c on c.CoursesId = sc.CourseId where sc.StudentId = @StudentID";
                    SqlCommand command = new SqlCommand(sql, connection);
                    command.CommandType = CommandType.Text;
                    SqlDataAdapter dataAdapter = new SqlDataAdapter(command);
                    // filling records to DataTable
                    dataAdapter.Fill(dataTable);
                    foreach (DataRow item in dataTable.Rows)
                    {
                        MyCoursesList.Add(new MyCourses
                        {
                            ID = Convert.ToInt32(item["StudentCourseId"]),
                            CourseNumber = Convert.ToString(item["CourseNumber"]),
                            CourseName = Convert.ToString(item["CourseName"]),
                            CourseDescription = Convert.ToString(item["CourseDescription"]),
                            Price = Convert.ToDecimal(item["Price"]),
                            Capacity = Convert.ToInt32(item["Capacity"]),
                            CreatedDate = Convert.ToDateTime(item["CreatedDate"]),
                        });
                    }
                }
            }
            catch (Exception ex)
            {
            }
            finally
            {
            }
            return View(MyCoursesList);
        }
    }
}
using StudentsAcademy.Area.StudentPortal.Models
@addTagHelper *, Microsoft.AspNetCore.Mvc.TagHelpers
@model IEnumerable<MyCourses>
@{ ViewBag.Title = "All Courses";}
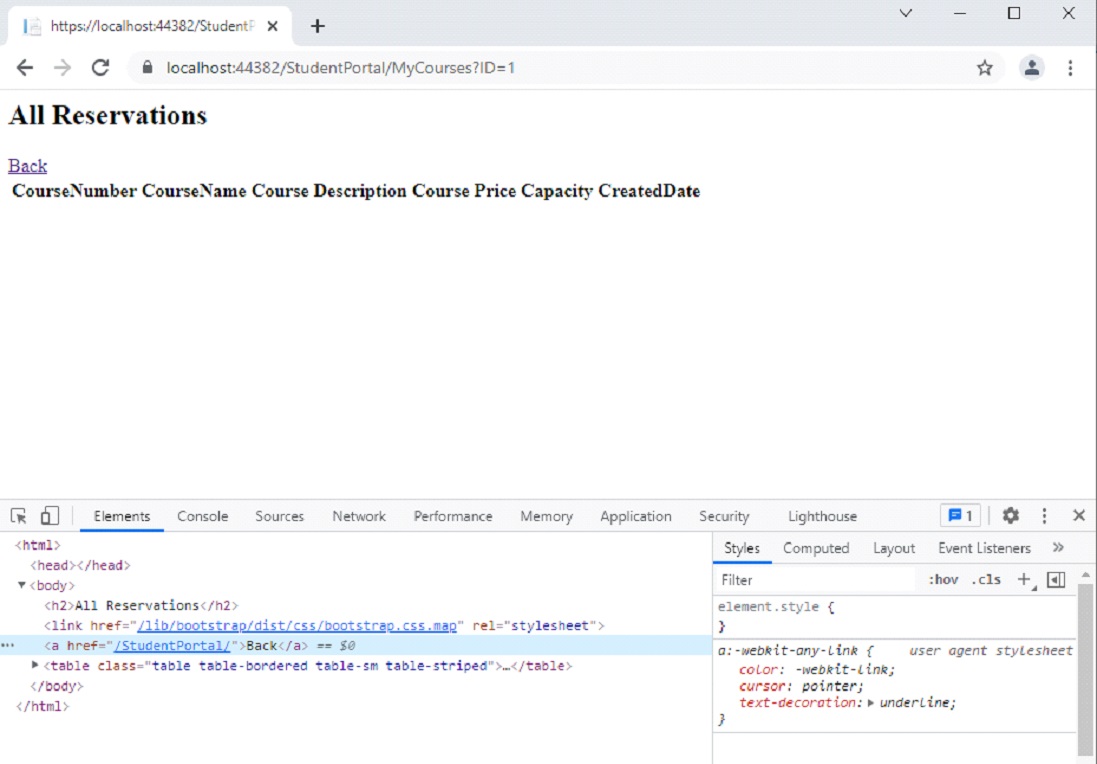
<h2>All Reservations</h2>
<table class="table table-sm table-striped table-bordered m-2">
<thead><tr><th>CourseNumber</th><th>CourseName</th><th>Course Description</th><th>Course Price</th><th>Capacity</th><th>CreatedDate</th></tr></thead>
<tbody>
@if (Model != null)
{
foreach (var r in Model)
{
<tr>
<td>@r.CourseNumber</td>
<td>@r.CourseName</td>
<td>@r.CourseDescription</td>
<td>@r.Price</td>
<td>@r.Capacity</td>
<td>@r.CreatedDate</td>
</tr>
}
}
</tbody>
</table>
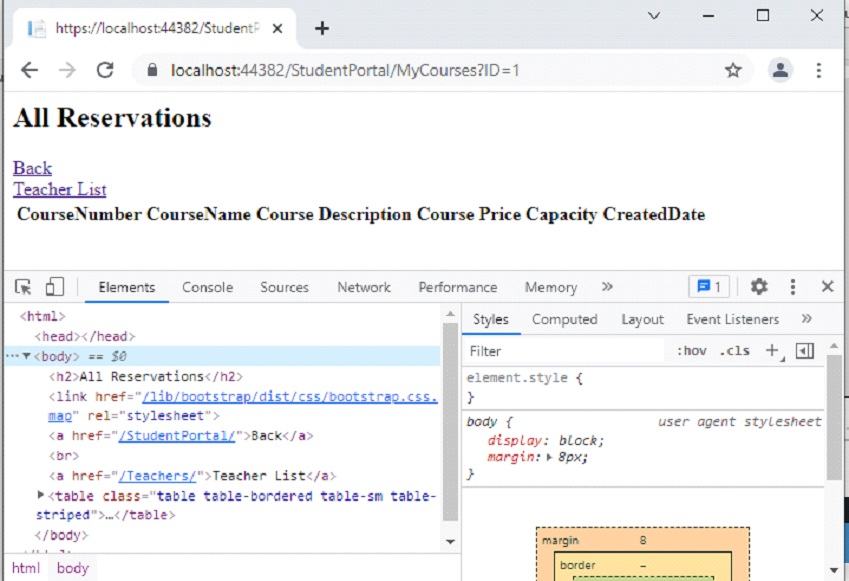
https://localhost:44382/StudentPortal/MyCourses?ID=1
asp-action = "action_name"
asp-controller="controller Name"
<a asp-action="Index" asp-controller="Home">Back</a>
using Microsoft.AspNetCore.Mvc;
using System;
using System.Collections.Generic;
using System.Linq;
using System.Threading.Tasks;
namespace StudentsAcademy.Areas.StudentPortal.Controllers
{
    [Area("StudentPortal")]
    public class HomeController : Controller
    {
        public IActionResult Index()
        {
            return View();
        }
    }
}
using Microsoft.AspNetCore.Mvc;
using System;
using System.Collections.Generic;
using System.Linq;
using System.Threading.Tasks;
namespace StudentsAcademy.Areas.Teachers.Controllers
{
    public class HomeController : Controller
    {
        [Area("Teachers")]
        public IActionResult Index()
        {
            return View();
        }
    }
}
@{
    Layout = null;
}
<!DOCTYPE html>
<html>
<head>
    <meta name="viewport" content="width=device-width" />
    <title>Index</title>
</head>
<body>
    This Home View from Student Portal Teachers Area
</body>
</html><a asp-route-area="Teachers" asp-action="Index" asp-controller="Home" >Teacher List</a>
@model IEnumerable<MyCourses>
@{ ViewBag.Title = "All Courses";}
<h2>All Reservations</h2>
<link href="~/lib/bootstrap/dist/css/bootstrap.css.map" rel="stylesheet" />
<a asp-action="Index" asp-controller="Home">Back</a>
<a asp-route-area="Teachers" asp-action="Index" asp-controller="Home" >Teacher List</a>
<table class="table table-bordered table-sm table-striped">
    <thead>
        <tr>
            <th scope="col">CourseNumber</th>
            <th scope="col">CourseName</th>
            <th scope="col">Course Description</th>
            <th scope="col">Course Price</th>
            <th scope="col">Capacity</th>
            <th scope="col">CreatedDate</th>
        </tr>
    </thead>
    <tbody>
        @if (Model != null)
        {
            foreach (var r in Model)
            {
                <tr>
                    <td>@r.CourseNumber</td>
                    <td>@r.CourseName</td>
                    <td>@r.CourseDescription</td>
                    <td>@r.Price</td>
                    <td>@r.Capacity</td>
                    <td>@r.CreatedDate</td>
                </tr>
            }
        }
    </tbody>
</table>


اترك تعليقك